Table of Contents
- Assessing the Damage Before You Repair Leather Car Seats
- What You’ll Need: Tools and Materials
- Step-by-Step: How to Fix Cracked Leather Car Seats
- Choosing a Leather Car Seat Repair Kit
- Preventing Leather Car Seat Wear
- Common Mistakes to Avoid
- Conclusion
- Frequently Asked Questions
Last Updated: October 2, 2026
Assessing the Damage Before You Repair Leather Car Seats
Before you repair leather car seats, work out what you are dealing with. Leather damage falls into three main types: surface scuffs, cracked panels, and full tears. Each needs a different fix.
The biggest mistake we see is people buying a kit before they know what they are fixing.
Start with these checks:
- Run your fingers over the area. Rough, dry patches mean the finish has worn away.
- Look for cracks. Shallow lines are surface damage. Deep splits mean the hide has dried out.
- Check for tears. If you can see the backing fabric, this is a tear, not a crack.
- Test a small spot. Wipe a hidden area with a damp cloth to see how the leather reacts.
Identifying the Leather Type
The repair method depends on the leather type. Most car seats use one of three finishes:
- Coated leather: A pigment layer sits on top. Common in most family cars. Easy to repair with colourant.
- Aniline leather: Dyed through with no coating. Rarer and harder to fix.
- Semi-aniline: A light coating with a soft feel. Needs gentle products.
Check your car’s handbook or look for a tag under the seat. If the leather feels smooth and slightly plastic, it is coated. If it feels soft and absorbs water quickly, it is aniline.
Using the wrong product on aniline leather can stain it permanently. Test everything on a hidden spot first.
Deciding Between DIY and Professional Repair
DIY works well for small scuffs and light cracking. It is a good option if you have time and patience.
Call a professional when:
- The damage covers a large area
- The leather is torn through to the backing
- The colour is hard to match
- The seat is in a lease vehicle you must return
Uniqcare handles car interior repair at your home, so there is no need to take the car anywhere.
What You’ll Need: Tools and Materials
A basic leather repair setup costs very little and covers most small jobs. Gather these before you start:
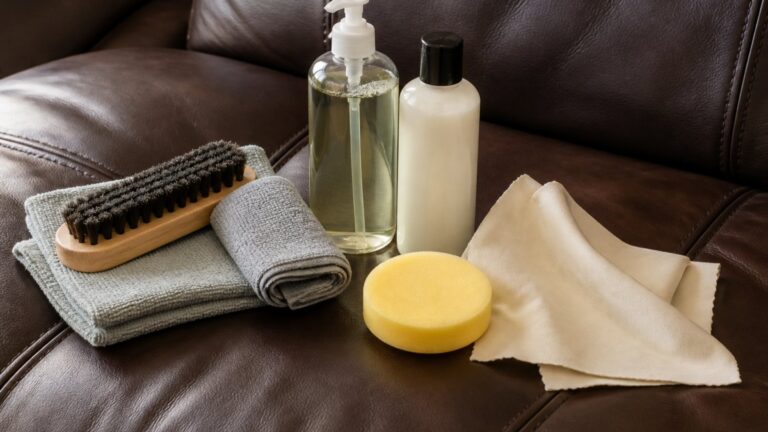
- Leather cleaner: A pH-balanced cleaner made for car interiors
- Microfibre cloths: At least three
- Fine sandpaper: 800 to 1000 grit
- Leather filler: Flexible, colour-matched to your seat
- Colourant: Matched to your car’s interior code
- Sealant or top coat: To protect the finish
- Small spatula or applicator
- Masking tape
- Hairdryer or heat gun: On a low setting only
You can buy these as a leather car seat repair kit or piece them together. Kits often work out cheaper and include instructions.
Total time: 1 to 2 hours for a small repair. Difficulty: Beginner to intermediate.
Step-by-Step: How to Fix Cracked Leather Car Seats
Here is the full process for how to fix cracked leather car seats. Work in a shaded, well-ventilated spot. Heat and direct sun make the filler dry too fast.
Step 1: Clean and Prepare the Area
Dirt stops filler and colourant from bonding. Clean the area first.
- Vacuum loose dust from the cracks.
- Wipe the seat with leather cleaner and a microfibre cloth.
- Let it dry fully, around 15 minutes.
- Tape around the repair zone to protect nearby stitching.
Lightly sand the edges of the crack with 800 grit paper. This gives the filler something to grip. Wipe away the dust.
Step 2: Apply Filler and Colourant
Now build up the damaged area in thin layers.
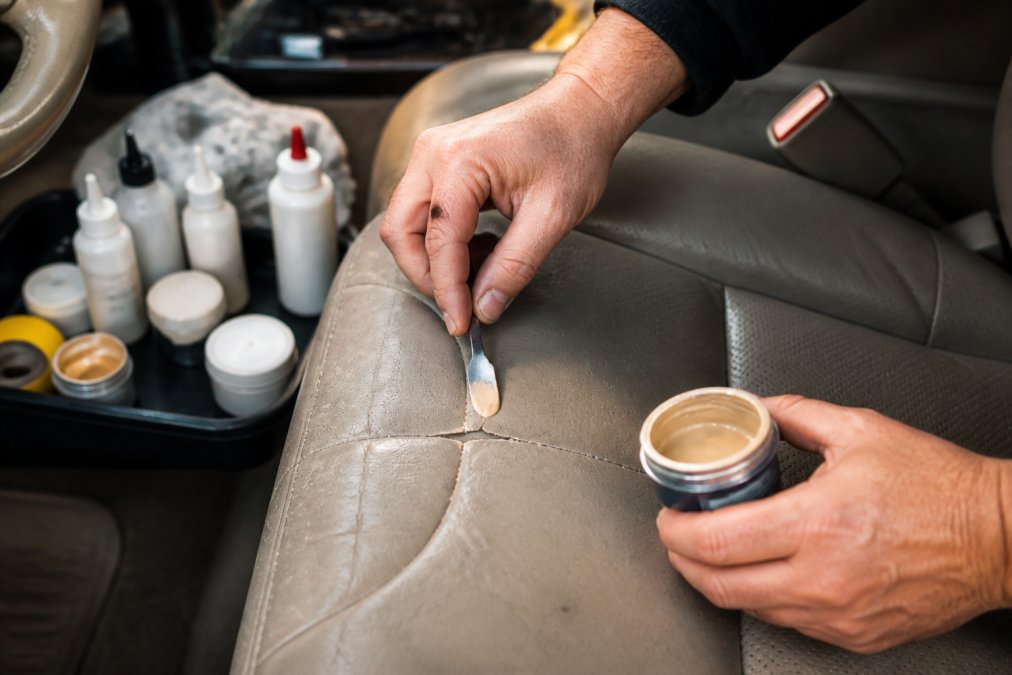
- Press filler into the crack with a spatula.
- Smooth it level with the surrounding leather.
- Let it dry, then sand gently until flush.
- Repeat until the surface feels even.
- Apply colourant in thin coats with a sponge or airbrush.
- Dry between coats with a hairdryer on low.
- Finish with a sealant to lock in the colour.
Let the seat cure for at least 24 hours before use.
Build filler in three or four thin layers rather than one thick one. Thick filler cracks again within weeks.
Choosing a Leather Car Seat Repair Kit
A good kit saves time and gives a better match. Look for these features:
| Feature | Why It Matters | What to Avoid |
|---|---|---|
| Colour matching system | Blends to your seat colour | Fixed single-colour kits |
| Flexible filler | Moves with the seat | Rigid, brittle filler |
| Sealant included | Protects the repair | Kits without a top coat |
| Applicator tools | Clean, even finish | Kits with no spatula |
| Clear instructions | Fewer mistakes | Vague or missing guides |
Match the kit to your leather type. Coated leather kits are common and cheap. Aniline kits cost more and need a gentler touch.
If you are unsure about the colour match, get a professional opinion first. Uniqcare colour-matches repairs so the finish blends in.
Preventing Leather Car Seat Wear
Prevention is cheaper than repair. A little care each month keeps leather supple and crack-free.
- Clean seats every four to six weeks.
- Condition the leather to stop it drying out.
- Park in the shade where you can.
- Use sun shades on hot days.
- Wipe up spills straight away.
- Avoid harsh household cleaners.
Watch the driver’s seat bolsters and the outer edges. These wear first because you slide across them getting in and out.
Most leather cracking comes from dryness and sun, not from age. Regular conditioning prevents far more damage than it fixes.
Common Mistakes to Avoid
The most common mistake is skipping the cleaning step. Filler will not stick to a dirty or greasy surface.
Other traps to dodge:
- Over-sanding. You can rub through the top coat and make the damage worse.
- Wrong colour. A patch that does not match stands out more than the crack did.
- Thick filler. One heavy layer cracks again fast.
- No sealant. The repair wears out within months.
- Using the seat too soon. Let it cure for a full day.
If a DIY kit has already made things worse, stop. A professional can often reverse a failed repair and blend it properly.
Conclusion
Small scuffs and light cracks are well within reach of a DIY repair. Deep tears, large panels, and tricky colour matches are not. Knowing the difference saves you time and money.
Uniqcare offers invisible repair of cuts, scrapes, and wear patches on leather car interiors and furniture. Our fully DBS checked technicians work at your home, so there is no downtime and no workshop queue. With over 40 years of experience, we match colour and texture so the repair blends in.
Get a quote from Uniqcare and restore your car seats without the fuss.
Frequently Asked Questions
Can you repair a hole in a leather car seat?
Yes, holes in leather car seats can be repaired. The process involves cleaning the area, applying a flexible filler, and then colour-matching the repair with a leather dye. For small holes, a DIY leather car seat repair kit may work, but larger or deep holes often require professional attention to ensure a durable, invisible finish. If the hole is larger than a 50p coin, it’s best to consult a specialist.
Is it worth repairing leather car seats or should I replace them?
Repairing is usually worth it if the damage is limited to the surface and the seat structure is sound. Repair costs a fraction of replacement and maintains the car’s original interior. However, if the leather is severely worn, torn in multiple places, or the padding is damaged, replacement might be more cost-effective in the long run. A professional assessment can help you decide.
What is the best leather car seat repair kit?
The best kit depends on the damage type. Look for kits that include a cleaner, filler, colourant matched to your car’s interior, and a sealant. Quality kits offer colour-matching charts or custom-mixed colours. Avoid cheap kits with generic colours, as they can look patchy. For best results, consider professional repair, especially for large or complex damage.
How long does a leather car seat repair last?
A properly executed repair can last for years, especially if the seat is well-maintained. Longevity depends on the repair method, product quality, and how well you care for the leather afterwards. Using a professional service often ensures a more durable result because they use high-grade materials and techniques. Regular cleaning and conditioning can extend the life of the repair significantly.