Quick Summary
To fix leather sofa cracks at home, first identify whether the crack is a shallow surface crease or a deep fissure, and check the leather type. Clean the area, fill thin layers of leather filler, sand lightly, colour-match the repair, then seal and cure it for at least 24 hours.
- Press the crack and check the flex test: springing back means a surface crease, a gap with raw edges means a deep fissure.
- Identify your leather type first, as aniline, semi-aniline and pigmented finishes need different repair methods.
- Apply filler in thin layers, since thick blobs shrink and crack as they dry.
- Test colourant on a hidden patch and build colour in thin coats, checking the match in natural light.
- Let the sealed repair cure for at least 24 hours before sitting on the sofa.
Table of Contents
- Identifying the Type of Crack in Your Leather Sofa
- Essential Tools and a Leather Sofa Repair Kit
- How to Clean a Leather Sofa Before Repair
- Applying Leather Filler for Cracks and Sanding the Surface
- Leather Repair Colour Matching and Colourant Application
- Sealing the Repair, Curing Time and Troubleshooting Failed Fixes
- Booking Uniqcare to Restore Your Leather Sofa
- Frequently Asked Questions
Identifying the Type of Crack in Your Leather Sofa
Most leather sofa cracks look alike at first glance, but they need very different fixes. Checking the depth and type of each crack before you decide on a repair helps you choose the right approach, whatever kind of leather sofa cracks you are dealing with.
Start by pressing your fingers gently along the crack. If the surface springs back and only the top layer looks broken, it is a surface crease.
Surface creasing versus deep fissures
Surface creases are shallow lines where the top coat has bent and split. They often appear on armrests and seat edges where people sit most.
Deep fissures go right through the protective finish and into the leather hide. They need filler and sometimes a sub-patch to hold together.
- Surface crease: shallow, flexible, colour mostly intact
- Deep fissure: open gap, pale or raw edges, may feel stiff
A useful check is the flex test: pinch the leather either side of the crack and release.
Leather type identification: aniline, semi-aniline and pigmented
Your repair depends on what the leather is made from, and this is the step most guides skip. The finish type decides whether filler and colourant will bond or sit on top and flake.
- Aniline leather: dyed through, soft, shows natural grain and marks easily. There is no protective top coat, so filler and colourant can darken the surface and look patchy. Use gentle products only, and accept that a repair will be visible rather than invisible.
- Semi-aniline leather: dyed with a light protective coat, common on family sofas. A thin colourant layer usually blends well, but heavy filler can look dull against the natural grain.
- Pigmented leather: has a solid colour finish on top, so it is the most forgiving to repair and match. Filler and colourant bond well, and a careful repair can be almost invisible.
Watch out: Heavy colourant on aniline leather can look patchy and sit on top of the surface rather than blending in. If the leather is aniline and the crack is deep, a professional repair or a specialist aniline dye is usually the better route.
Will a DIY repair hold? A quick decision framework
Use the leather type and crack depth together to decide before you buy a kit:
- Pigmented leather, surface crease: DIY repair is very likely to hold. Clean, fill thinly, colour and seal.
- Pigmented leather, deep fissure: DIY with a sub-patch is realistic, but expect a visible repair line on high-wear areas.
- Semi-aniline, surface crease: DIY conditioning and a thin colourant usually work; avoid thick filler.
- Semi-aniline, deep fissure: DIY is possible but the colour match is harder; test on a hidden patch first.
- Aniline, any crack: DIY colourant rarely matches invisibly. Conditioning helps creases; deep fissures are best assessed by a specialist.
If the leather feels brittle across a whole panel rather than just at the crack, the finish is failing over a wider area and a spot repair will not solve it. In that case, conditioning the whole sofa and seeking advice is more sensible than patching one crack.
Essential Tools and a Leather Sofa Repair Kit
You do not need a workshop to fix a crack at home. A basic kit covers most jobs.
A typical leather sofa repair kit should include:
- Leather filler or repair compound
- Fine-grit sandpaper (around 400 grit)
- Leather colourant in a matching shade
- Sealer or top coat
- Soft cloths and a small palette knife
- Isopropyl alcohol for cleaning
Pick a kit that lists the leather type it suits, since not all kits work on every finish.
How to Clean a Leather Sofa Before Repair
Cleaning is an important step before any repair, as dirt, oil and old conditioner can stop filler and colourant from gripping.
- Vacuum the crack area with a soft brush attachment.
- Wipe the area with a leather cleaner or a damp cloth with mild soap.
- Wipe again with isopropyl alcohol on a cotton pad to remove grease.
- Let the area dry fully, usually for around 30 minutes.
Expected result: The surface feels dry, slightly squeaky, and free of any residue.
Applying Leather Filler for Cracks and Sanding the Surface
Once the surface is clean, apply the filler in thin layers. Thick blobs shrink and crack as they dry.
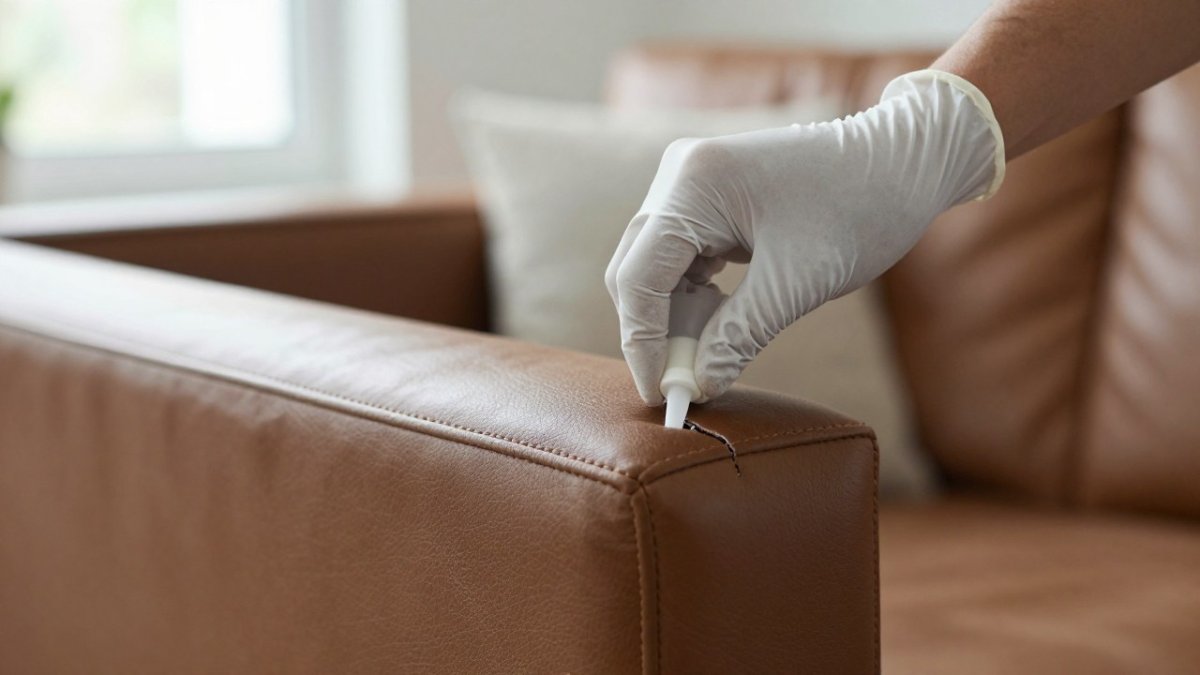
Press the filler into the crack with a palette knife, then smooth it flush with the surrounding leather.
When the filler is fully dry, sand it lightly with fine-grit sandpaper.
Watch for the shine difference too. Sanded filler looks dull compared with the rest of the leather, and that is normal until colourant goes on.
Using sub-patches for deep cracks
For wide or deep fissures, filler alone may not hold. A sub-patch is a thin piece of leather-backed fabric or repair fabric that sits under the crack and gives it support.
Cut the sub-patch slightly larger than the crack. Glue it under the leather with a leather-safe adhesive, press it flat, and let it cure before filling over the top. This step makes a visible difference on sofa arms that take a lot of pressure.
Leather Repair Colour Matching and Colourant Application
Colour matching is where many DIY repairs stand out. A slightly wrong shade is easy to spot in daylight.
Test the colourant on a hidden patch, such as under a cushion or along the back. Let it dry completely, then compare it in natural light.
Apply colourant in thin coats with a sponge or soft cloth. Build up the colour gradually, letting each coat dry.
- Match the shade in daylight, not under lamps
- Blend the edges of the repair into the surrounding leather
- Feather the colourant outward so there is no hard line
Sealing the Repair, Curing Time and Troubleshooting Failed Fixes
Sealing protects the repair from wear, rubbing and moisture. A good top coat also helps the colour last.
Once the colourant is dry, apply a thin layer of leather sealer. Allow it to cure for at least 24 hours before sitting on the sofa. To find out which conditioner suits an older sofa, see the best leather conditioner for old sofas. Heavy use too soon can lift the repair.
Diagnosing a failed repair
If the repair peels, cracks again or looks patchy, the cause usually points to one specific step. Match the symptom to the likely cause before redoing anything:
- Filler lifts at the edges: the area was not cleaned properly, or the filler was applied over old conditioner or silicone. Strip it back, clean with isopropyl alcohol and start again.
- Filler cracks along the original line: it was applied too thickly or in one coat. Remove the loose filler and rebuild in thin layers, letting each dry fully.
- Colourant looks patchy or darker than the sofa: the colourant does not suit the leather type, or it was applied too heavily. On aniline and semi-aniline leather, thin coats build a better match than one thick coat.
- Repair feels tacky or lifts under pressure: it was sealed before the colourant had fully dried, or the sealer was applied too thickly. Remove the sealer with a leather-safe cleaner and reapply thinly once the colour is fully dry.
- Colour match is slightly off in daylight: this is common and fixable. Test a small adjustment on a hidden patch, then feather a thin corrective coat over the repair rather than recoating the whole panel.
Reworking a repair that has failed
Do not fill over a failed repair. If your leather is peeling, this guide to stopping leather sofa peeling walks through diagnosing the problem. Lift any loose edges gently with a palette knife, remove the loose filler and colourant, and clean the area again with isopropyl alcohol. Let it dry fully, then repeat the repair from the filling stage. If the same crack fails twice, the leather underneath is likely too brittle or the crack is too deep for filler alone; a sub-patch or a professional assessment is the more reliable route.
Making the repair last
A repair holds best when the leather around it stays supple. Condition the whole sofa every few months with a product suited to its finish, keep it out of direct sunlight and away from radiators, and wipe up spills promptly. A well-prepped repair on pigmented leather can last under normal domestic use, while repairs on aniline leather or high-wear armrests may need more frequent checking.
The table below sums up the common failure symptoms, their likely causes and the fix for each.
| Symptom | Likely cause | Fix |
|---|---|---|
| Filler lifts at the edges | Area not cleaned properly, or filler applied over old conditioner or silicone | Strip back, clean with isopropyl alcohol and start again |
| Filler cracks along the original line | Applied too thickly or in one coat | Remove loose filler and rebuild in thin layers, drying fully between coats |
| Colourant looks patchy or darker | Colourant unsuited to the leather type, or applied too heavily | Use thin coats on aniline and semi-aniline leather |
| Repair feels tacky or lifts under pressure | Sealed before colourant fully dried, or sealer applied too thickly | Remove sealer with a leather-safe cleaner and reapply thinly once dry |
| Colour slightly off in daylight | Common match variation | Feather a thin corrective coat over the repair |
Booking Uniqcare to Restore Your Leather Sofa
Some cracks are simple to fix at home, but larger tears, multiple damaged cushions or valuable antique pieces often need a skilled hand. You can see what colour-matching service is available in this guide to leather sofa colour matching.
Uniqcare has over 40 years of experience, and its technicians are fully DBS checked. Current prices are available on the Uniqcare website, and you can request a quote there.
Last Updated: 9 November 2026
BUTTON: Get a Quote
CARD_TITLE: Is your leather sofa beyond a DIY fix?
CARD_TEXT: Uniqcare restores leather and fabric furniture at your home, with over 40 years of experience.
Frequently Asked Questions
Can cracks in a leather sofa be repaired?
Most cracks in a leather sofa can be repaired, provided the leather is not split right through to the backing. Surface creasing and shallow fissures usually respond well to cleaning, filling, colouring and sealing. Deep cracks often need a sub-patch behind the damage before filler is applied. Pricing and suitability depend on the sofa’s age, the leather type and the extent of the damage, so Uniqcare recommends checking current prices or requesting a quote on the website before deciding whether to repair or replace.
What is the best product for repairing cracked leather?
A flexible leather filler designed for furniture, combined with a matching leather colourant and a suitable top coat, gives the most durable result for cracks. A purpose-made leather sofa repair kit usually includes the basic items, though kits vary in colour range and quality. Avoid general-purpose glues or household fillers, which tend to stiffen and crack again as the leather flexes. Professional repairers can match colour more accurately than most kits allow.
How do you stop a leather sofa from cracking further?
Keep the leather conditioned with a product suited to its finish, usually every few months, so it stays supple. Keep the sofa away from direct heat, radiators and strong sunlight, which dry the hide out. Wipe up spills promptly and avoid leaving dyed clothing in contact with light-coloured leather. Regular dusting removes grit that can work into the surface and cause fine cracking over time.
When should you get a cracked leather sofa professionally repaired?
Consider a professional repair if the cracks are deep, widespread, or located on a high-wear area such as the seat or arm, or if you are struggling to match the colour. Professionals can also assess whether the leather type is suitable for repair. Uniqcare carries out repairs at your home, so you do not need to move the sofa, and its technicians are fully DBS checked. Current prices are available on the Uniqcare website.